Customers
Purpose
Customer management setup.Procedure
General Settings
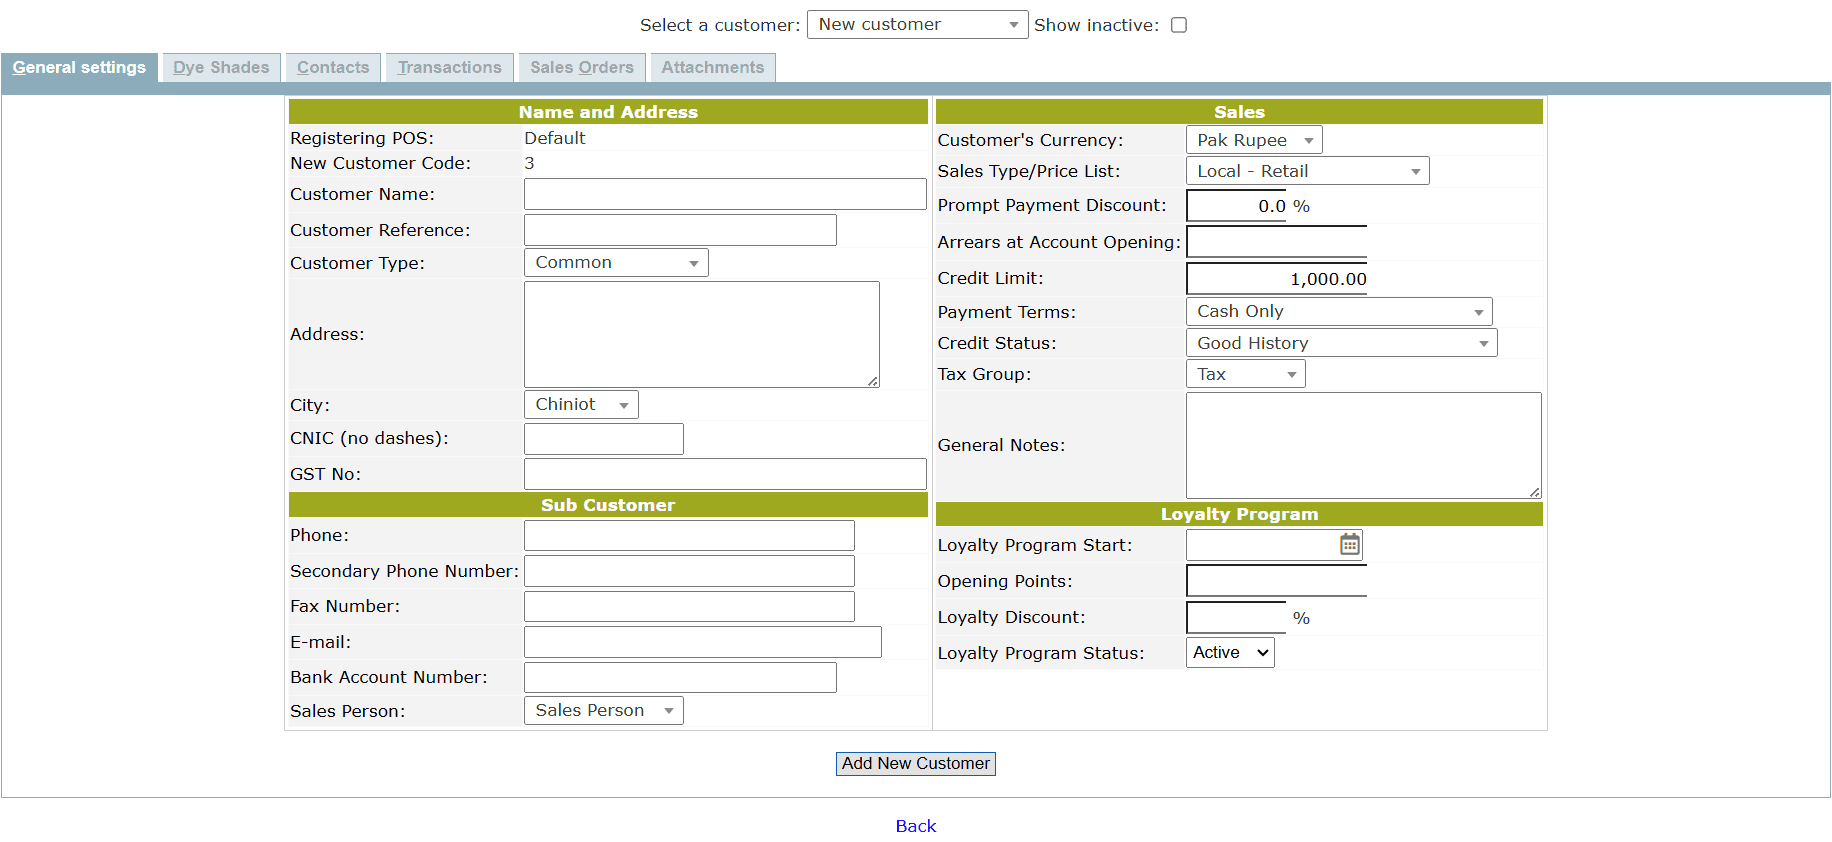
Name and Address
- Enter the Customer Name
- Enter Customer Reference
- Select the Customer Type from the drop-down list
- Enter the complete Address of the customer
- Select the preferred PoS location of the customer
- Select the City of the customer from the drop-down list
- Enter the CNIC number of the customer
- Enter the GST number of the customer
Sub Customer
- Enter the Phone number
- Enter the Secondary Phone Number
- Enter the Fax Number
- Enter the E-mail address
- Enter the Bank Account Number
- Select the Sales Person from the drop-down list
Sales
- Select the Customer's Currency from the drop-down list
- Select the Sales Type/Price List from the drop-down list
- Set the Prompt Payment Discount of the customer
- Enter the Arrears at Account Opening
- Set the Credit Limit of the customer
- Set the Payment Terms of the customer
- Set the Credit Status of the customer
- Select the Tax Group from the drop-down list
Loyalty Program
- Set the Loyalty Discount% of the customer
- Set the Loyalty Program End date of the customer
- Select the Loyalty Program Status from the drop-down list
Dye Shades
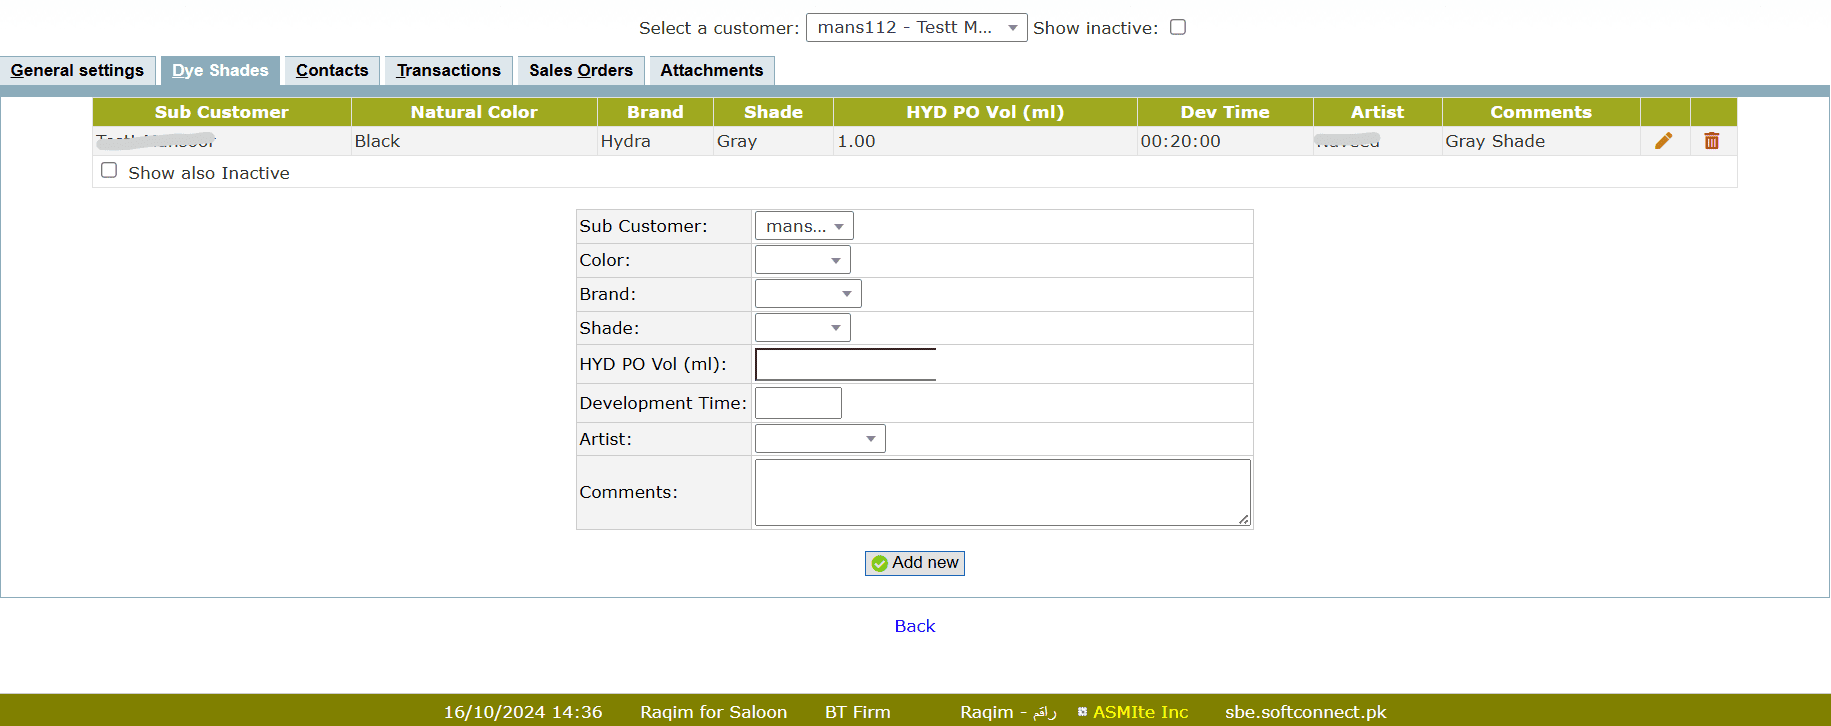
- Select the Sub Customer from the drop-down list
- Select the Color from the drop-down list
- Select the Brand from the drop-down list
- Select the Shade from the drop-down list
- Enter the Volume of Developer used in Dye
- Enter the Development time taken
- Select the Artist from the drop-down list
- Enter the relevant notes in Comments
Contacts
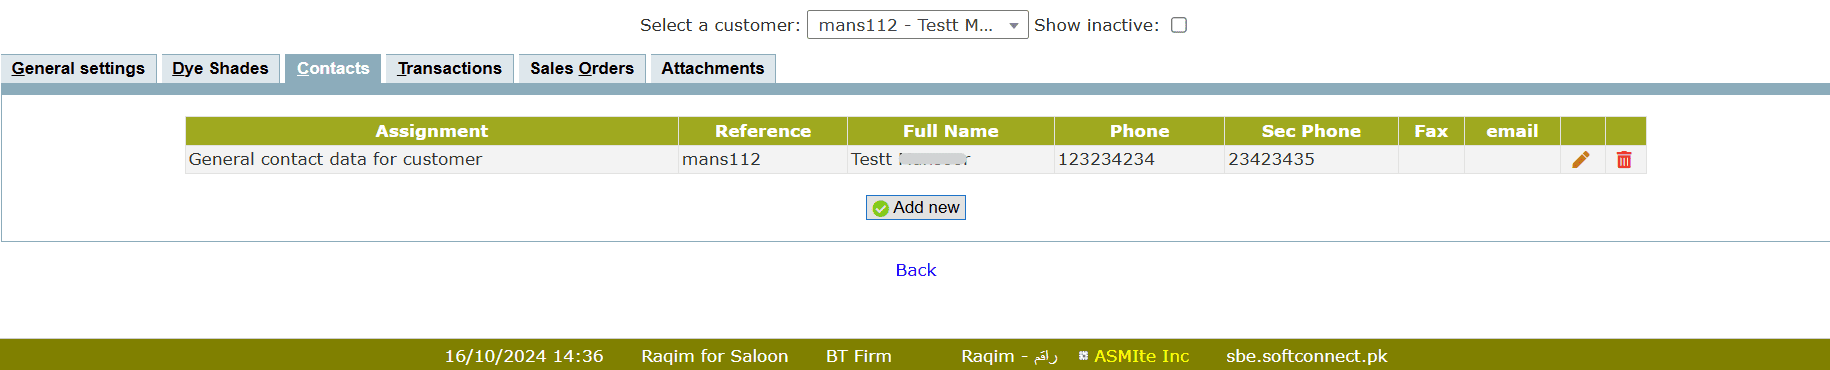
- Click on the Add new button to add a new contact
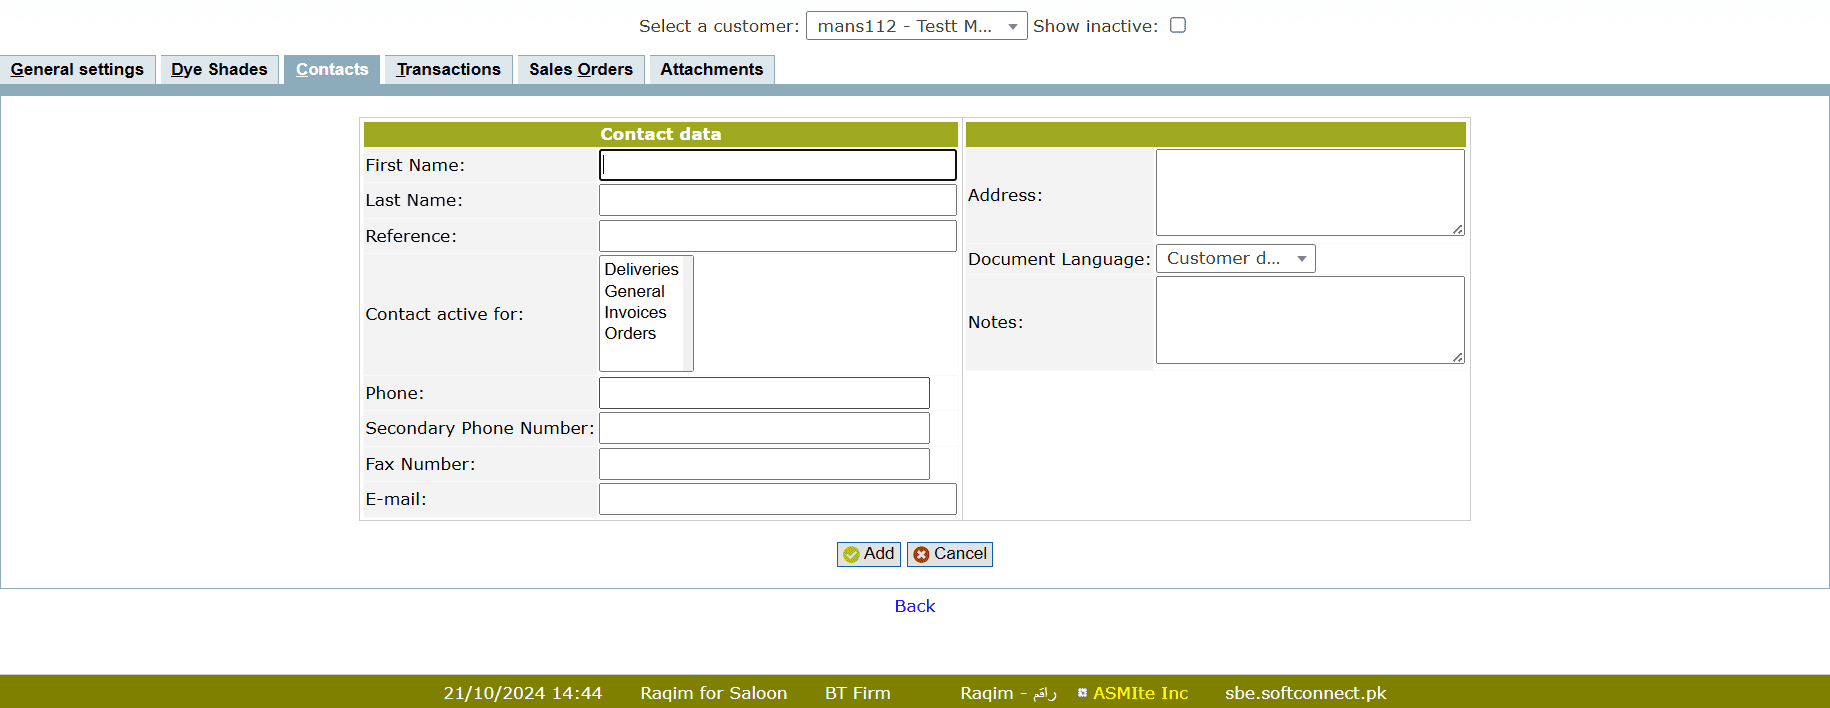
- Enter the required data and click Add button to add new contact
Transactions

It provides the Transaction history of the customer within the selected Time period. Raqim also allows to check specific Transaction type by selecting it from the drop-down list
Sales Orders
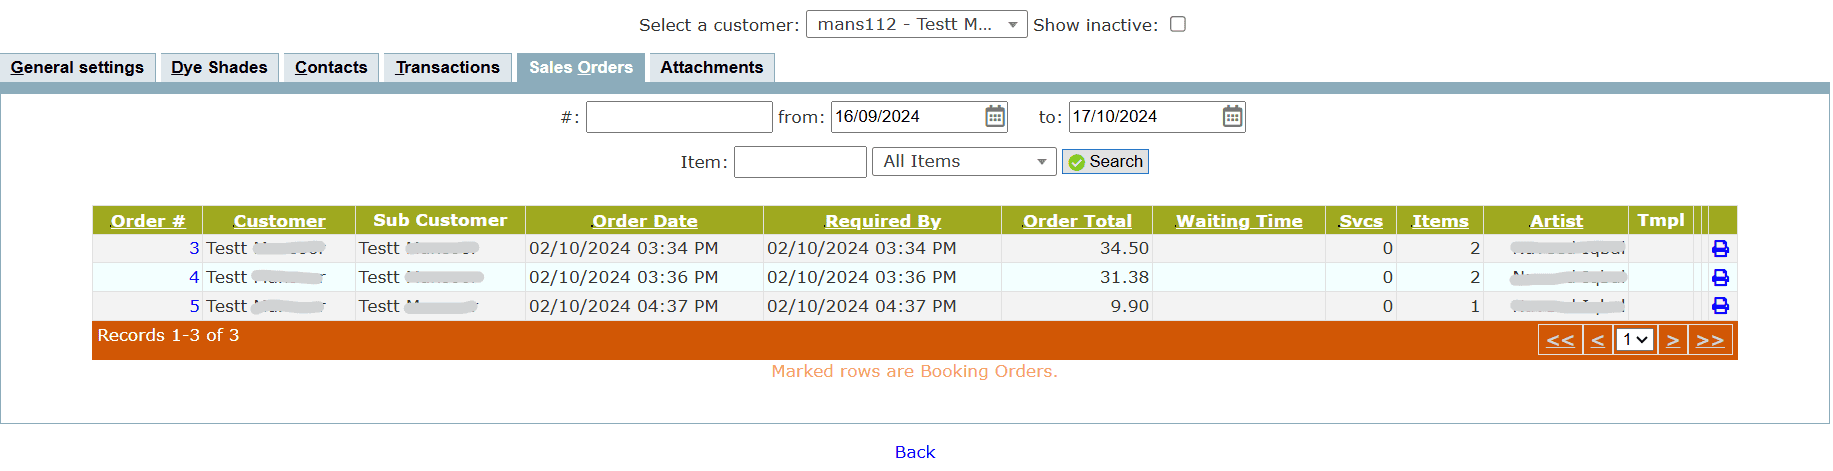
It provides the customer Sales Order history. Enter the Order# to search the exact Sales Order or set the time period and Item to search relevant Sale Orders.
Click on the Edit button to edit the sales order
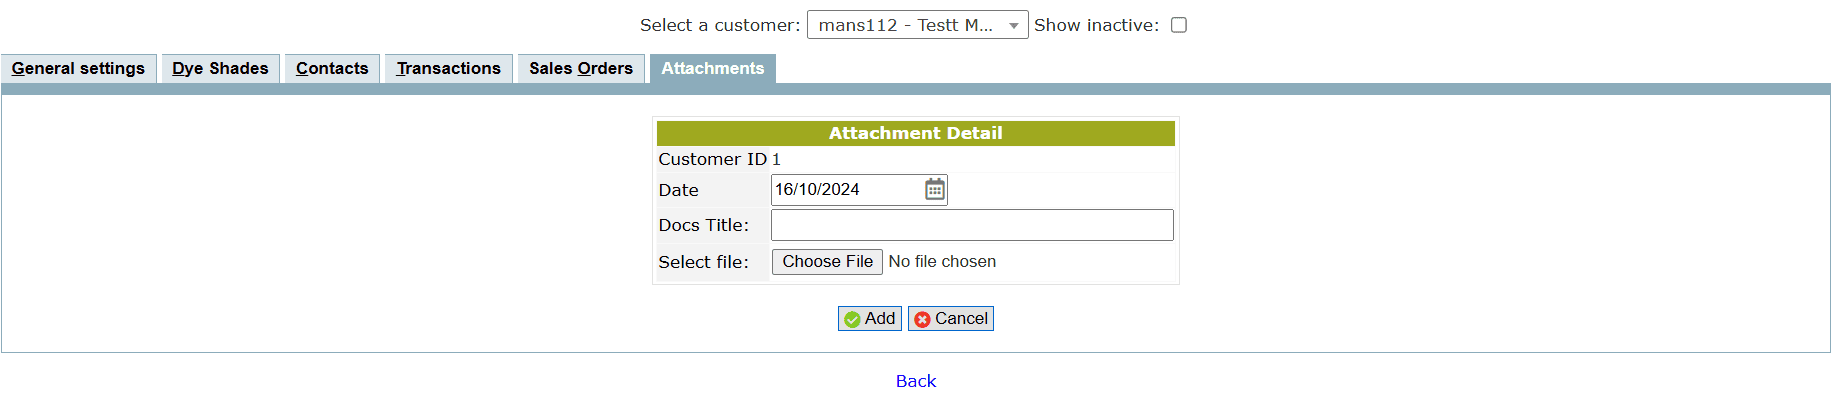
Attachments

- Click on the Add new button to add new attachment
- Set the Date of attachment
- Enter the Document Title
- Click on the Choose File button to upload
- Click on the Add button to confirm attachment
Tips and Tricks
What will happen if I don't fill Sub Customer form?
If you Add new Customer without filling the Sub Customer form, Raqim will automatically create a sub customer, however, you can edit/add new Sub Customer later
What is the purpose of Dye Shades?
It is used to keep record of customer's Dye Shades history. It helps to keep record of customer's Dye Shade preferences