Salary Setup
Purpose
Salary Setup managementProcedure
Payroll Settings

- Set the Accrued Payroll Expense Account from the drop-down list
- Set the Payroll Expense Account from the drop-down list. Payroll transfers to this account by default
- Set the Overtime Account from the drop-down list. Overtime compensation of the Employee is paid by this account (if overtime is allowed to the employee).
- Set the Personal Advance Payable Account from the drop-down list
- Set the Service Advance Payable Account from the drop-down list
- Set the Encashment Payable Account from the drop-down list
- Set the Default Leave Cycle of the company
- Set the Default Last day of Week of the company
- Set the Basic Salary Calculation Basis of the company
- Set the Basic Salary Missing Hours Deduction
- Set the maximum Number of Grades
- Set the Default EOBI Account
- Set the Default Social Security Account
Divisions

- Enter the Division Name and Click Add new to create new Division
Departments

- Enter the Department Name
- Enter Actual Duty Hours of the Department
- Enter Minimum Duty Hours of the Department
- Select the Salary Basic Account of the Department from the drop-down list
- Click Add new to add new department
Sub Departments

- Select the Department from the drop-down list
- Enter the Sub Department Name
- Click Add new to add new sub-department
Sections

- Enter the Section Name and Click Add new button to create new section
Sub Sections

- Select a Section from the drop-down list
- Enter the Sub Section Name
- Click on the Add new button to create new sub-section
Floors

- Enter the Floor Name and click Add new to enter new floor
- Floor defines the floor of the workplace
- For Example: Basement, Groundfloor, 1st floor, etc
Job Positions

- Enter Position Name
- Enter the Basic Salary Amount of the position
- Select the Pay Basis of the Job Position from the drop-down list
- Set the Resign Acceptance Authority of the Job Position from the drop-down list
- Click Add new to add new job position
Position Grades

- Select a Job Position
- Set the Salary Grades of the Job Position
- Click Add new to add
Pay Elements

- Enter Element Name
- Select the responsible Account from the drop-down list
- Set the Calculation Basis of Pay element
- Set the Missing Hours Deduction sequence of the pay element
- Click Add new to add
Pay Elements Allocation

- Select a Job Position from the drop-down list
- Check the Checkbox against the relevant Pay Element and click Save to Allocate
- To Inactive an existing Pay Element
- Click on the Show Inactive Checkbox
- Check the Inactive checkbox to disable the Pay Element
EOBI Payment

- Click on the Edit button against the Employee to edit his EOBI Contribution
Social Security Payment

- Click on the Edit button against the Employee to edit his Social Security Contribution
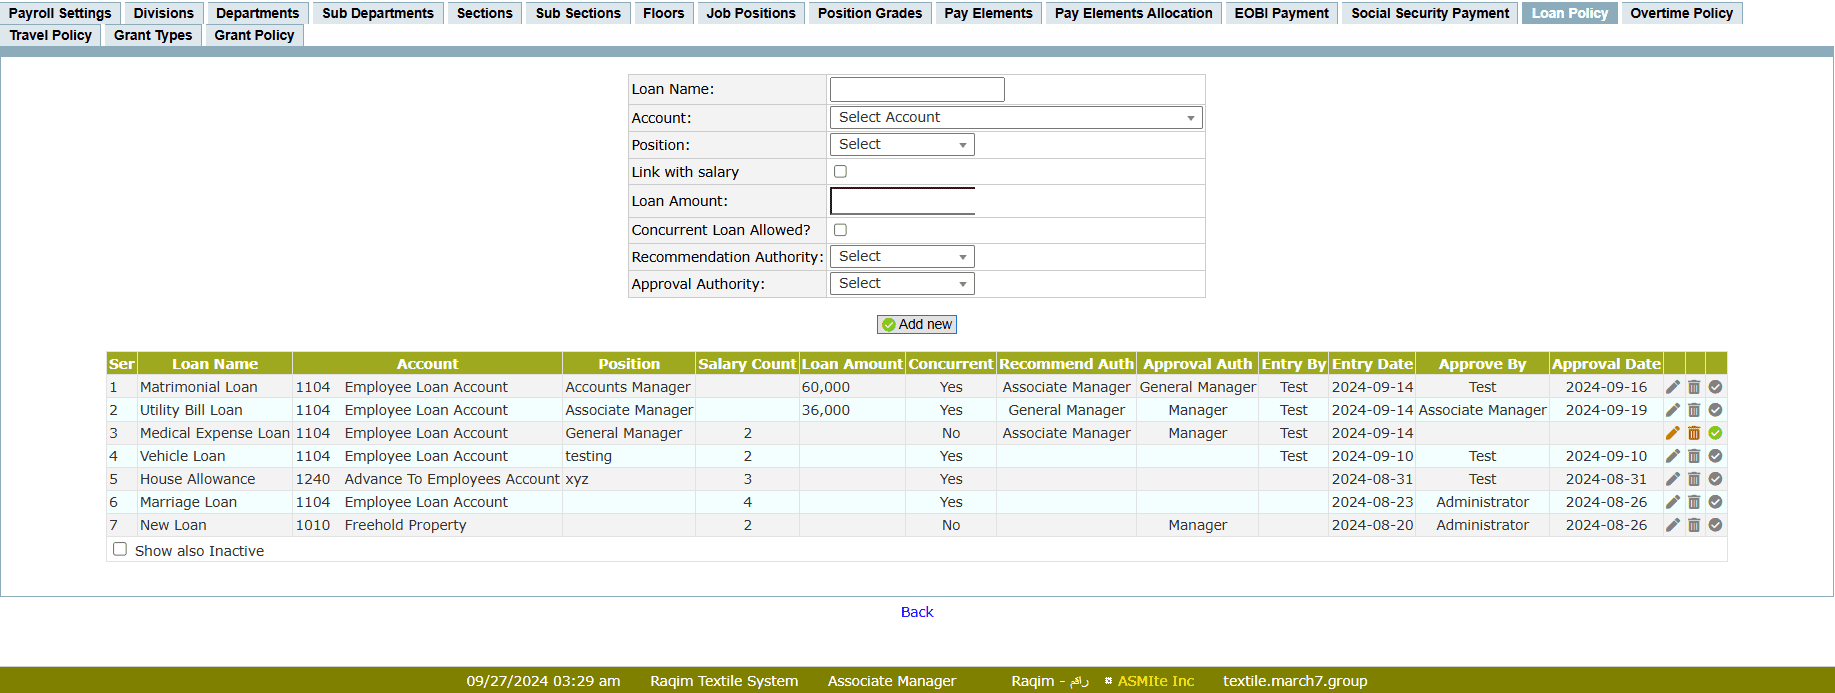
Loan Policy

- Enter the Loan Name
- Select the responsible Account against the Loan Policy
- Select the Job Position eligible for the Loan Policy
- Set whether the Loan Policy is linked with salary or not
- If not linked, then enter the exact Loan Amount
- If linked, then;
- Select the No. of Salaries applicable as loan
- Check the Concurrent Loan checkbox if the loan policy is applicable in the presence of concurrent loans
- Select the Job Position which can Recommend the Loan Policy
- Select the Job Position which can Approve the Loan Policy
- Click Add new to add the Loan Policy

Overtime Policy

- Set the Overtime rate
- Enter the Overtime Name
- Click Add new to add
- Set the required rank for the approval of overtime policy
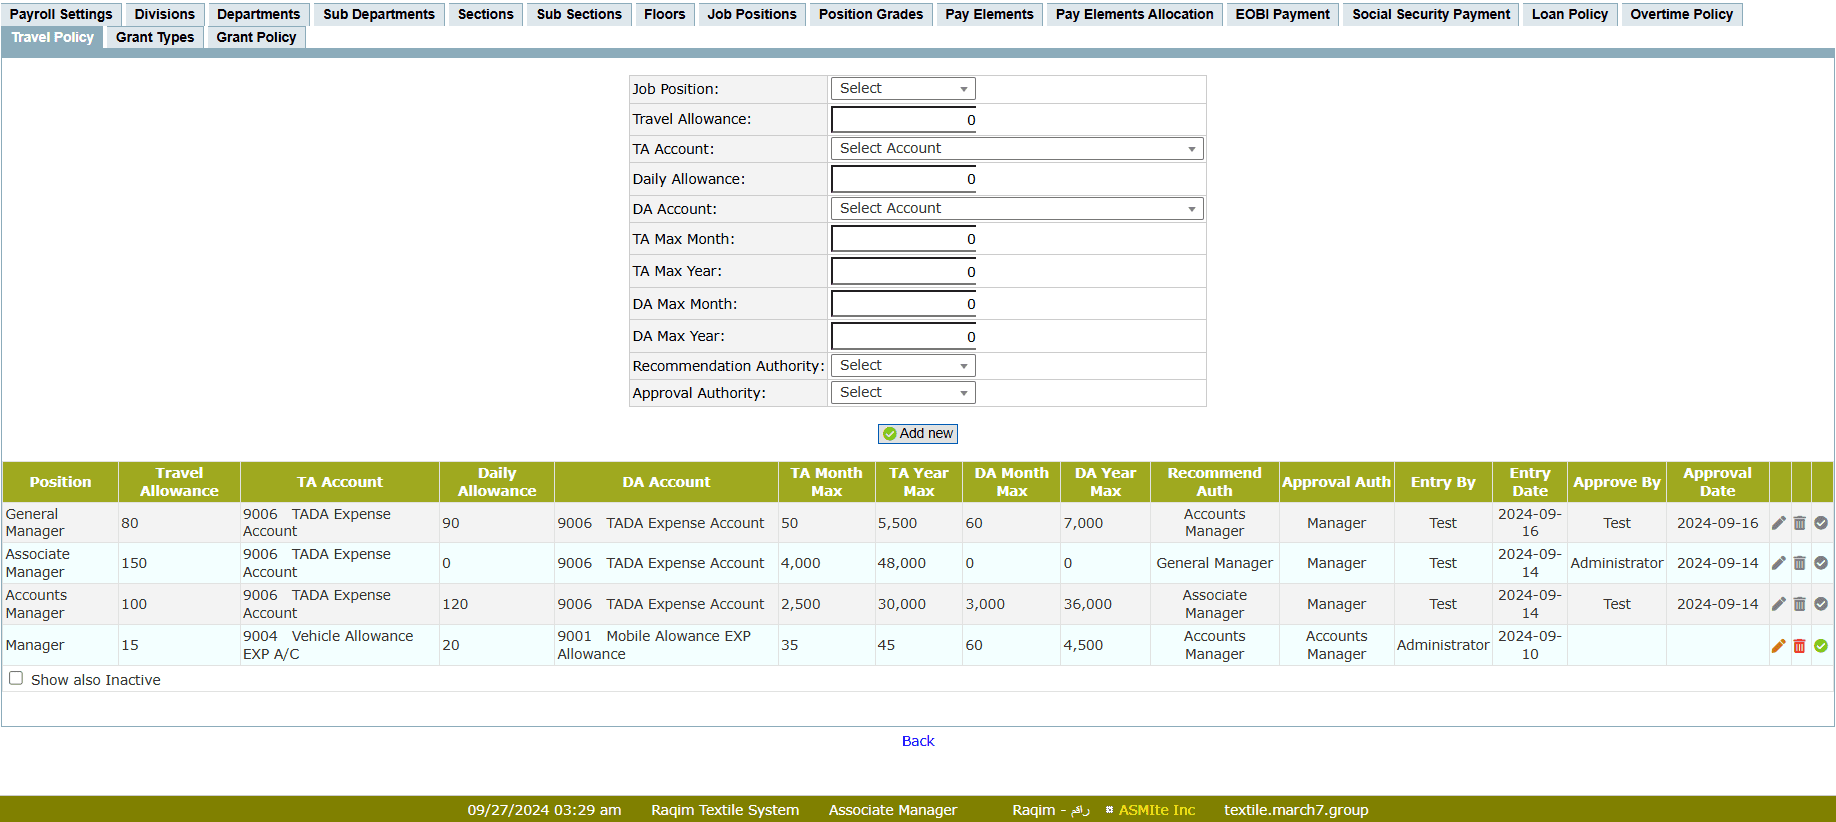
Travel Policy

- Select the Job Position from the drop-down list
- Enter the amount of daily Travel Allowance
- Set a TA Account from the drop-down list
- Enter the amount of Daily Allowance
- Set a DA Account from the drop-down list
- Enter the amount of TA (Travel Allowance) Max per Month allowed
- Enter the amount of TA (Travel Allowance) Max per Year allowed
- Enter the amount of DA (Daily Allowance) Max per Month allowed
- Enter the amount of DA (Daily Allowance) Max per Year allowed
- Click on the Add new button to submit the Travel Policy
Grant Types

- Enter the Grant Name and click on the Add new button to create new Grant Type
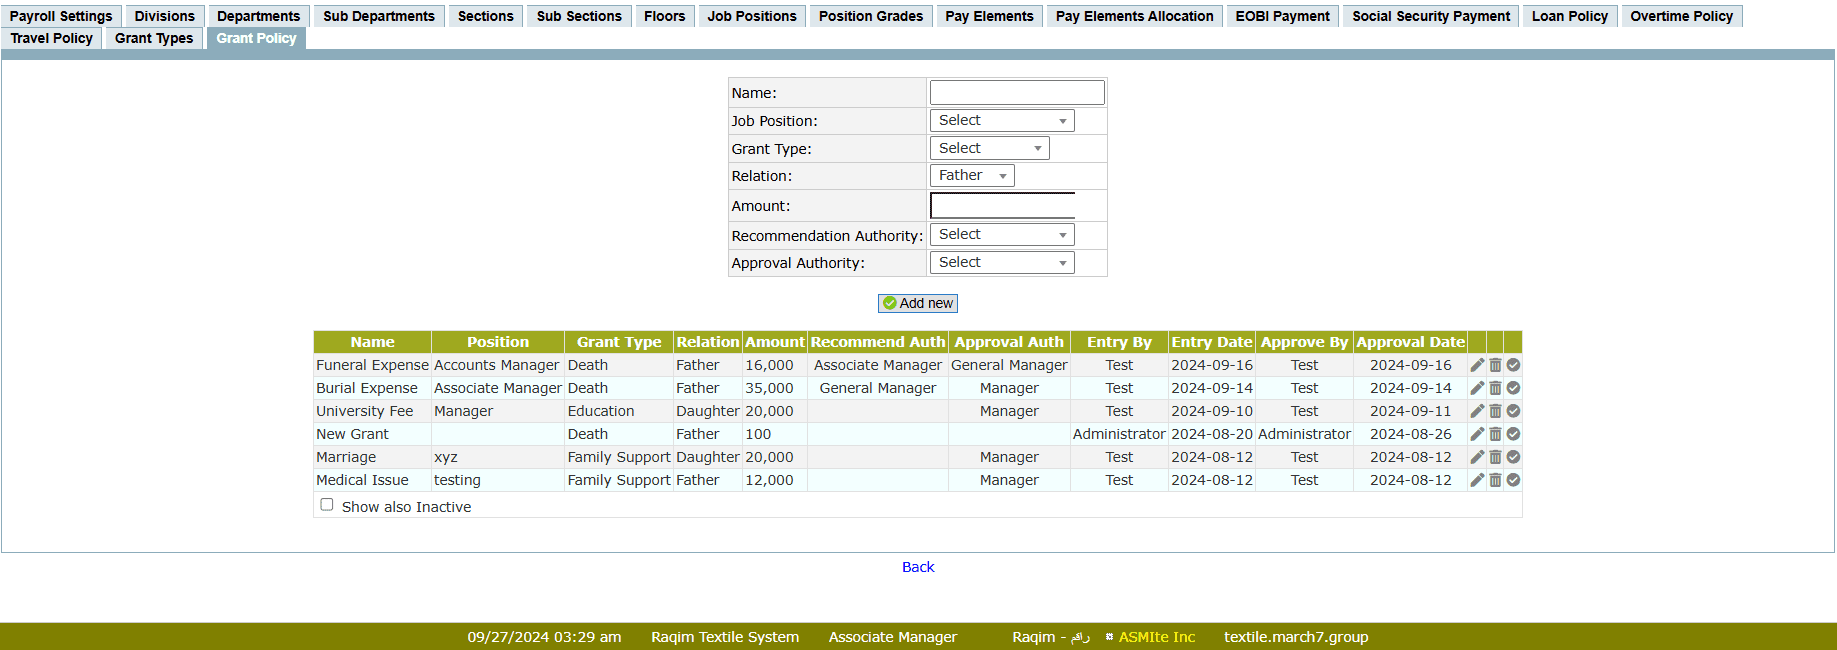
Grant Policy

- Enter the Name of the policy
- Select a Job Position from the drop-down list
- Select a Grant Type from the drop-down list
- Select a Relation from the drop-down list
- Enter the Amount of the grant
- Select the role which can Approve the grant (i.e. Supervisor/Authority)
Tips and Tricks
How does Overtime Count? Do I have to Mark-in again for overtime?
No, you don't have to mark-in again. Once an overtime request is approved (through attendance inquiry), system starts counting overtime automatically after the regular working hours of the employee
What is DA (Daily Allowance)?
Daily allowance (DA) is the sum of daily allowances given to Employees in shape of Health Allowance, Meal Allowance, Inflation Allowance, etc.