Quick Entries
Purpose
Many transactions you enter for your business are repetitive. If you find yourself regularly entering similar types of bank deposits or payments, journal entries or supplier payments and credits, a Quick Entry is what you need. A Quick Entry pre-populates fields in the relevant transaction screen for you, although you can override the values while entering the transaction if you wish. Quick Entries also allow you to allocate a transaction amount to different fixed accounts or taxes. Setting up a Quick Entry involves defining the entry first, then creating numerous transaction lines that adjust the remaining balance and apply it to the correct accounts. Quick Entries are also known as Preset Transactions.
Procedure
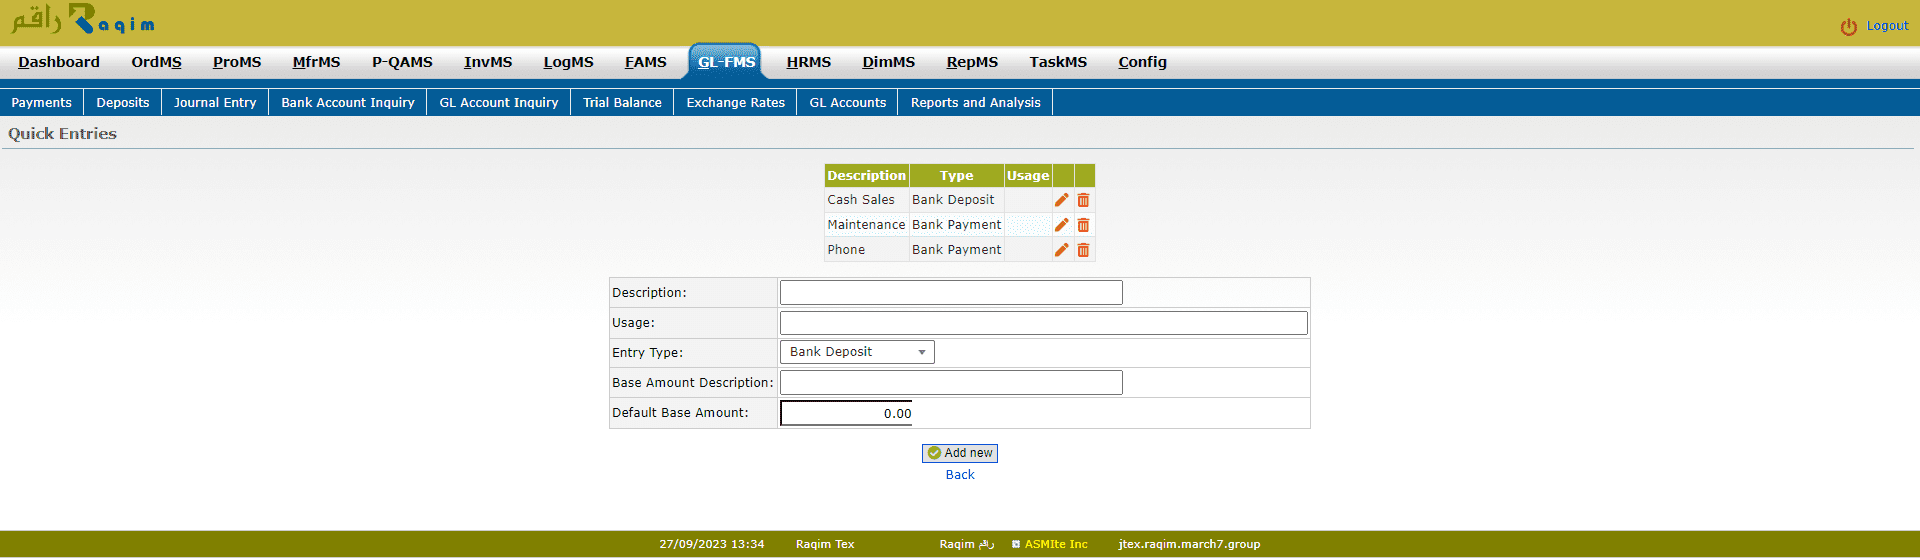
- GL-FMS => Maintenance Menu => Quick Entries
- Enter/Modify existing entries.
- Choose a name for your quick entry and default amount used as a base for calculations.
- Determine type of entry i.e. page for which the quick entry is designed for.
- Last two input fields defines:
- default base amount used at the start of calculations
- description of base amount used as remainder during quick entry usage
- If you press the Edit link on a Quick Entry you get a new form below where you can edit the sequence of operations performed on base amount (Quick Entry Lines).
Every operation defines how the amount posted to selected account is calculated. Currently following type of operations are defined:
- Post constant amount to selected GL account.
- Post percent part of base amount to selected GL account
- Post taxes for selected tax type, using base amount as net value.
- Post taxes for selected tax type, using base amount as value with tax included.
- Post remainder from previous calculations to selected GL account.
After most operations the base amount can be increased, decreased or not changed depending on option selected. For every operation you can also select dimension(s) if you want to keep track of a dimension.
You normally don't need more lines for this quick entry if this is type Phone bill, gasoline or other kinds of simple bills. Later on you can create more sophisticated entry lines.
If tax should be included in the base amount you can first select a line Tax included, reduce base and select the correct tax type. And a line with Remainder put on the account you want to put the rest on. Order is important in this instance - the Remainder entry must come last. That's it!
Operation
If the quick entry Entry Type is:
- Journal Entry
- Navigate to GL-FMS=>Journal Entry. Select the quick entry from the drop down menu in the top right corner of the page
- Bank Deposit
- Navigate to GL-FMS=>Deposits. In the top middle of the page, select from the drop down menu labelled "from" and choose Quick Entry. Select the specific quick entry from the drop down menu labled Type.
- Bank Payment
- Navigate to GL-FMS=>Payments. In the top middle of the page, select from the drop down menu labelled "Pay To:" and choose Quick Entry. Select the specific quick entry from the drop down menu labled Type.
Fill in the Amount field and click Go, and the respective fields of the form will be filled for you based on how you configured the Quick Entry.
Tips and Tricks
Let us start with a simple one. You want to make a Quick Entry for phone bills.
First go into Quick Entries and create a new Quick Entry. Select Bank Payment and call it f.i. Phone. Don't set a fixed amount. Save it and select it again. Create 2 Quick Entry Lines.
- Select Tax included, reduce base. Select the relevant tax type.
- Select Remainder and select the expense account for Phone bills.
If you don't use tax, then omit the first line.Go into Bank Payments, select Quick Entries and select the Phone. Add the amount from the bill and press go. Your lines should be there ready for processing.
Here is a more advanced one. If you only have a few employees you probably don't have a payroll program. You can preset a couple of Quick entries for that.
Say your employee has a salary of Rs.2,000. The payroll tax is 11.02% and the withholding tax is 15%. First create a Quick Entry, Type: Bank Payment. Call it Salary X. Eventually preset the amount Rs.2,000. And some entry lines:
- % amount, select a Salary account (or create one, expense), 100%, Save
- % amount, select an account for accrued payroll tax (or create one, liability), -11.02%, Save.
- % amount, select a payroll tax account (or create one, expense), 11.02%, Save.
- % amount, select an account for withholding tax (or create one, liability), -15%, Save.
If you have a fixed amount of tax, you could instead have choosen Amount, and the amount (negative). Go into Bank Payments, select Quick Entries and select the Salary X. Select Go and your lines are ready for processing.
Here is one that works well for entering expenses that were subject to VAT and were booked to a personal credit card.
Create a quick entry :
Label it Gross Amount
Select Journal
Put the Gross Amount into the default base amount field
- amount -100% book to the credit card ( minus sign so it is credited to the liability )
- Taxes included, reduce base - books the tax amount to the appropriate tax account
- Remainder - to the appropriate GL account for the expense.
using this makes the entry fairly quick.. You set up a few like this with common descriptions so you don't have to edit them all...
Here's another example using 'Tax Included' bank payments you may make eg. for monthly rent.
In many countries, when you purchase something for your business you pay a 'tax inclusive' price (eg. VAT or GST). When you make a bank payment for the item you allocate the pre-tax component to an expense account, then allocate the remainder to a pre-paid tax account. Let's assume you pay your rent monthly, and it's a fixed amount per month eg. Rs500.00.
First create the Quick Entry by clicking the 'Add New' button. Give the entry a description eg. Monthly Rent and nominate its type 'Bank Payment'. You pay Rs500.00 per month, so enter this value into the 'Default Base Amount' field, and give it a name too: 'Monthly Rent Payment'. Click the 'Add New' button. Now it's time to define the transactions associated with this payment. Click the new entry you just made in the list. As the payment includes the VAT/GST amount, select 'Taxes included, reduce Base' in the Posted dropdown box. Nominate the ledger account you with post the tax to eg. 'VAT' or 'GST' and identify the applicable tax rate eg. 'GST 10%'. Click 'Add new' to apply this transaction to the quick entry. Now you need to allocate the remainder of the amount. Select 'Remainder' in the Post dropdown and select the correct ledger account, in this case 'Rent'. Click 'Update' and you're finished.
You now have a monthly rent payment transaction that makes the correct journal transaction for the full amount: the Bank account you selected reduces by Rs500.00 (CR), the tax account receives Rs45.45 (DR), and the rent expense account is debited Rs454.55 (DR).
To use your new Quick Entry account select 'Payment' in the Banking and General Ledger tab. In the Payment screen you click 'Quick Entry' in the 'Pay To' dropdown and then click 'Go' (don't forget this step or the entry won't be set up for you). Now you'll see the correct ledger account and amount selected for you automatically. You can override the 'Amount' if you wish, and also allocate a Dimension if you wish. When you click 'Process Payment' button, the correct journal entries will be made for this Bank Payment.